

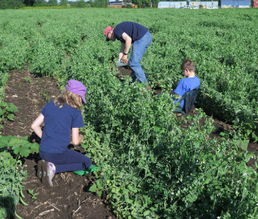
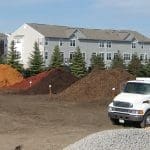


Wow! It is hard to believe July is over and we are on to August. With the late spring, it seems like we just started with landscaping jobs. Pahl’s had another great month of landscaping with the install of beautiful projects. August tends to be a busy month, it’s the start of the Minnesota State Fair, kids getting ready to go back to school, and people realizing time is running out to get landscaping done before the end of the season.
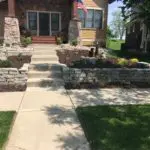
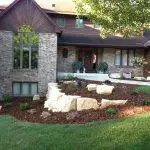
This month I want to share a stunning project we did for a customer in Lakeville. It consisted of tearing out all the existing plant material and hardscape material around the foundation of the client’s home and finished with the install of a completely new look, including; plant material, three retaining walls, and a paver patio.
FIRST STEP: THE CONSULTATION/PROJECT DESIGN
I first met with the homeowners in May at their home in Lakeville. As I pulled up in the driveway, I was immediately impressed with the beauty of their property. I was excited to meet with the client to find out how I could help them update their landscaping. We did a complete walk around the entire foundation which included landscaping that had once looked great but now needed a fresh new look. On one side of the house, there were three timber walls that the client needed to be replaced along with a walk-out lower level door that led into a wet grassy area that needed a usable patio area. When I left the clients home, I was excited to develop a design that would fit the client’s expectations. The proposal for the landscape project was presented to the client, on-site at Pahl’s, to allow the client to look at plant material and hardscape options. At that time, we were also able to make any last minute changes to the project and get the client on the install schedule. In the end, the project consisted of complete removal and disposal of plant material along with the installation of three retaining walls, paver patio, edging, plant material, mulch, and rock.
SECOND STEP: DEMOLITION
Rainy weather is never a landscaper’s friend and with this project, the rain caused a delay of two weeks. Once we were able to get started, I did a walk through with the crew so they’d all have an idea of the “big picture” from beginning to end. The first few days of the project, the crew worked on tearing everything out around the foundation and getting down to the bare soil so we could re-establish bed lines and begin the installation process.
THIRD STEP: INSTALLATION SOIL/ EDGING/ PLANT MATERIAL/ RIVER ROCK/ MULCH
Upon completion of removing plant material, we would normally start installing the hardscapes (retaining walls, paver patio). In this situation, the rain made that too difficult so we started with installing the landscape beds. We put in new soil to fill in the holes made by removing the plant material and to build up along the foundation to get the proper grade. After the soil was installed, I was able to place the plant material in their designated spots and paint the bed lines. This enabled the crew to start planting and to lay the edging. The edging consisted of Anchor Concrete Bullet Edger’s Tan Color. After the install of the edgers and plant material, we laid Preen and Landscape poly for weed control. Finally, we put down Colored Dark brown mulch and 2.5” River Rock.
RETAINING WALLS/ PAVER PATIO
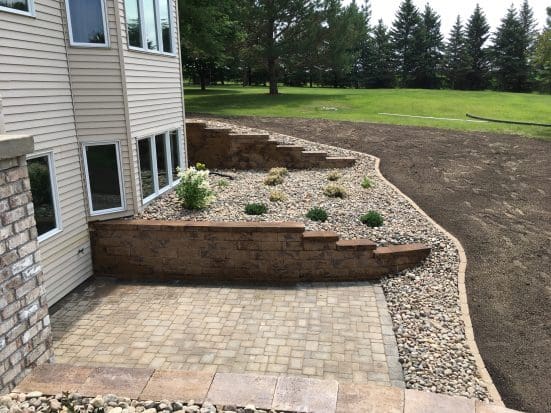
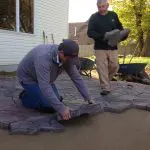
Even though the rain put us behind, it gave me the opportunity to help out, working side by side with the crew. As the weather became decent and the ground dried up, we started the install process for the retaining walls and paver patio. We dug out the soil for the walls and prepped the ground for the Class 5 base. Once the base was laid, the retaining wall blocks were stacked and pinned until we reached the desired height. To give the wall a finishing touch, we installed the cap along the length of each wall. The retaining walls and cap consisted of County Tribute Retaining Wall Block and Cap, Canyon Brown Color. 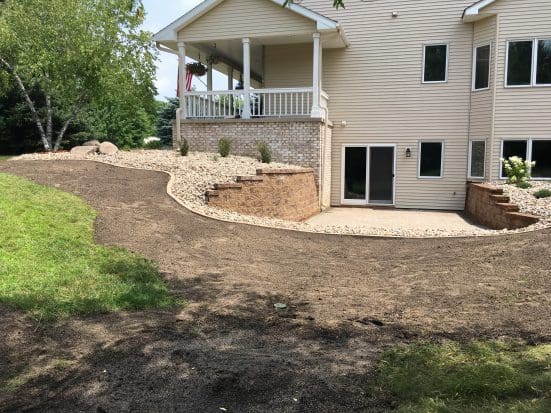
Next, we began the install of the paver patio. We laid 8” of Class 5 base, packing it every 2-3” with no more than an inch of sand for leveling. Pavers were then installed, packed, and swept with polymeric sand for the grout lines. The pavers consisted of using Borgert Cobble Series, Minnesota River Color, with a 6×9 Onyx Color Border.
FOURTH STEP: FINISHING TOUCHES
With the retaining walls and paver patio in place, we were now able to install drain tile along with the remainder of the edging, plant material, landscape poly, and river rock. Next, we brought in some additional soil and grass seed to fix any turf that may have been damaged during the install. Things were looking great, but before we could call it a wrap, the crew and I did a complete walk-thru of the entire landscape project to do any last minute watering and cleaning that needed to be done.
This was an exciting landscape project for me to be part of because I was able to spend time working with my amazing crew and creating a beautiful landscape project. Also, because the clients were good friends of my immediate family, I knew I would be getting feedback. The clients were great to work with from start to finish and as we were doing our final walk-through, they mentioned how pleased they were and how wonderful the landscape project turned out.
Pahl’s landscaping staff is so very blessed to have amazing customers! I can’t wait to share a project with you next month.

0 Comments